Contents
- 1 Introduction
- 2 How It Works
- 3 Considerations
- 4 Walk Through
- 5 Set up
- 6 Use
- 7 Advanced
- 7.1 Frame Jump
- 7.2 Random Delay
- 7.3 Mutating Properties
- 7.3.1 Available Property Constants
- 7.3.1.1 Alpha
- 7.3.1.2 Amplitude
- 7.3.1.3 Background Speed Ratio
- 7.3.1.4 Enabled
- 7.3.1.5 Neon
- 7.3.1.6 X Offset
- 7.3.1.7 Z Offset
- 7.3.1.8 Z Position
- 7.3.1.9 Quake
- 7.3.1.10 X Ratio
- 7.3.1.11 Z Ratio
- 7.3.1.12 X Repeat
- 7.3.1.13 Z Repeat
- 7.3.1.14 X Spacing
- 7.3.1.15 Z Spacing
- 7.3.1.16 Transparency
- 7.3.1.17 Water Mode
- 7.3.1.18 Wavelength
- 7.3.1.19 Wave Speed
- 7.3.1 Available Property Constants
- 7.4 Share this:
- 7.5 Like this:
Introduction
On the surface, OpenBOR does not natively support animated background layers. What it does give you is a variety of layer effects, including palette cycling, palette cell cycling through the neon effect, affine transforms, and automated sine wave distortion.
Usually, though, if you want true animated background elements, the standard approach is to spawn entities from a model, then carefully configure scrolling, scripted positioning, or other placement logic to anchor them into the level. That approach is by design, because it gives you almost unlimited capability. OpenBOR can support up to 5000 active entities per frame, and any single entity can occupy anything from one pixel to the entire visible stage. Entities also have the engine’s full visual effect library at their disposal. Beyond that, unlimited subscreens and direct-draw graphics make virtually any visual concept possible.
Still, sometimes power is not the same thing as convenience. Sometimes you just want a background element to animate like a background layer.
As it happens, you can. OpenBOR already gives you all the primitives you need:
- Unlimited layers.
- Script access to read and mutate layer properties.
- An enable flag checked first in the rendering pipeline.
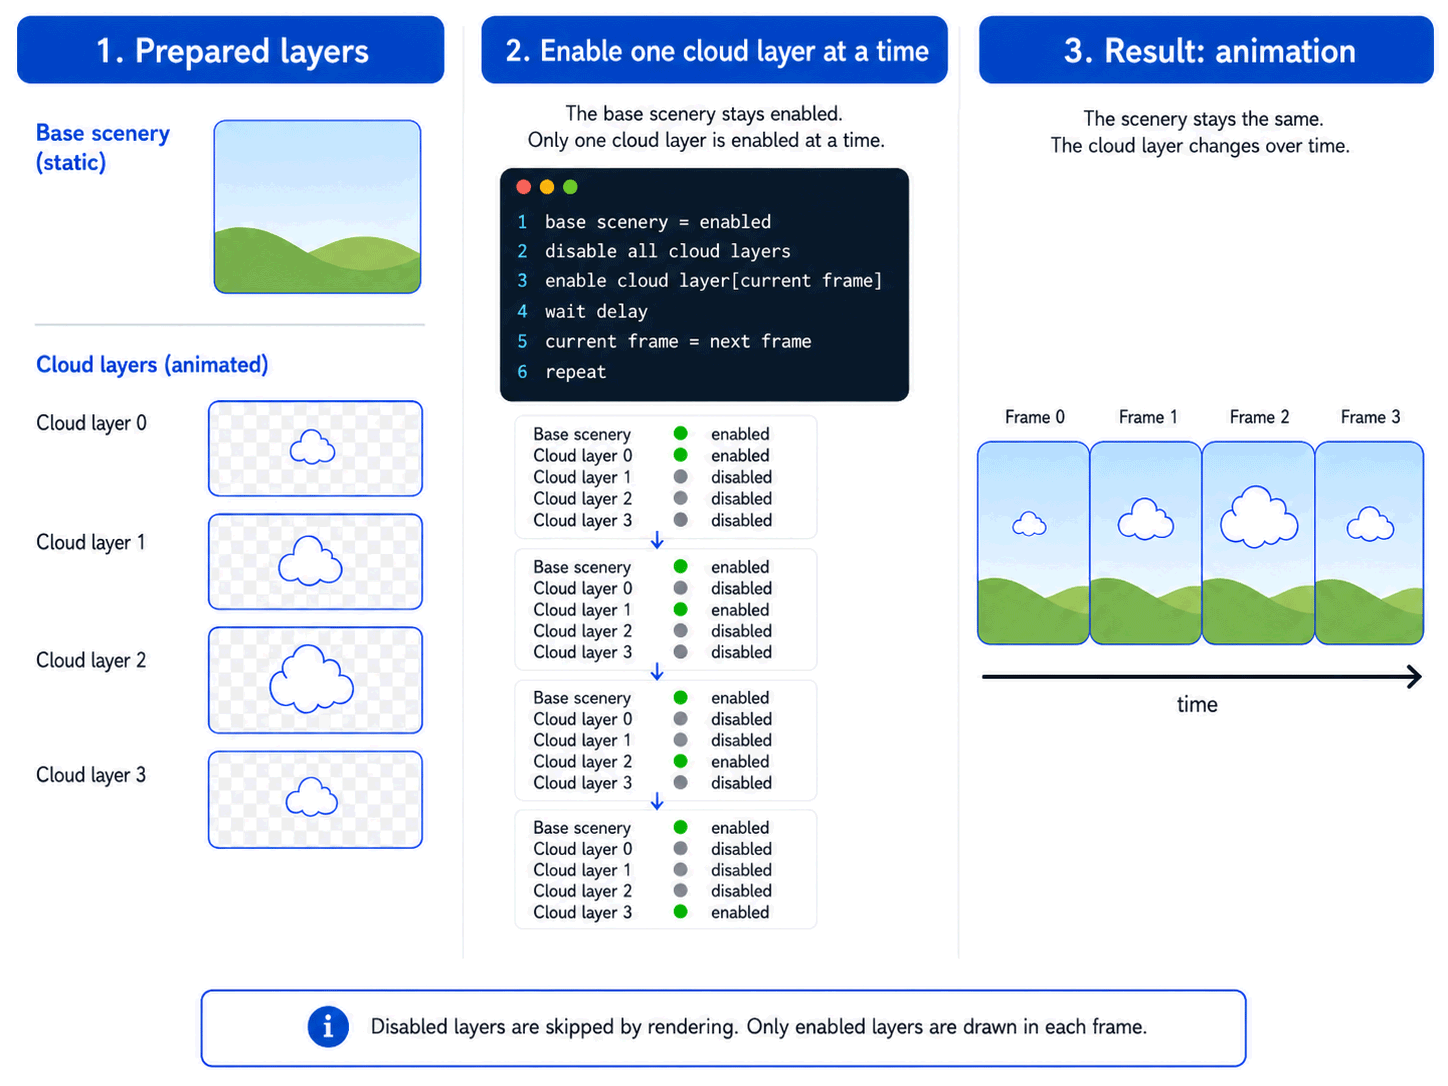
That last point is the trick. The enable flag is the first thing OpenBOR checks when processing a layer. If it is false, the renderer moves on immediately. That makes disabled layers extremely cheap, which is exactly what we need for cycling a stack of prepared animation frames.
That is what the DC Layer Cycle library is for. It is a set of script functions that allow you to define a sequence made of layers, then play them back live for a seamless background animation.
How It Works
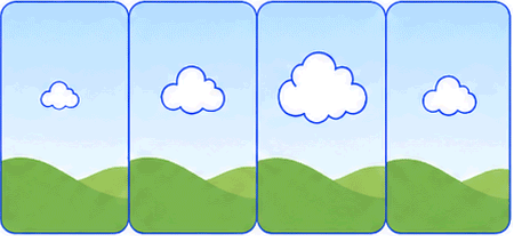
In its basic form, the script takes control of a defined block of fglayers. We use fglayers because they are the most powerful layer type. They may be positioned anywhere on screen, assigned layer priority, and manipulated through script.
At the start of the level, the script instantly disables the entire block of animation layers. Then, during gameplay, it enables one layer at a time and disables the previous one as the sequence advances. The effect is the same basic idea as sprite animation: each layer is a prepared animation frame, and the script cycles through those frames in order.
Since disabled layers are skipped immediately by the renderer, the inactive frames stay cheap until they are needed.
Considerations
Advantages
- Simple – Once you pay the time cost of installing the library, spinning up background animations is very quick and easy. No need to build models or bother setting up entity spawns.
- Efficient – Layer cycles are lighter than models and entities. The script library itself is highly optimized and it can run as many individual animations as you need.
- Modular – If you need more advanced sequences than the script alone can offer, you can easily integrate it into a controlling entity which may reside anywhere in the level.
Limitations
- Layers – You are still controlling layers, not spawned entities. OpenBOR layers are simplistic by design, and all of the same layer limitations apply. For example, layers do not have left-right flipping.
- Initial complexity – Obviously you do have to install this library or something similar to make it work.
In short, layer cycling cannot replace entity spawns entirely, and it isn’t meant to. Think of it as a supplement. Best practice is a mixed approach using the right tool for the job. When you need highly complex sequences or rich visual effects, spawn entities. When you only need basic visual effects and animation, employ layer cycling.
Walk Through
Installation
1. Download and install the DC D20 Library. This is a required dependency and includes its own installation instructions.
2. Download the Layer Cycle library or the exhibition module. The exhibition module is recommended because it lets you see the code, dependencies, and setup in action.
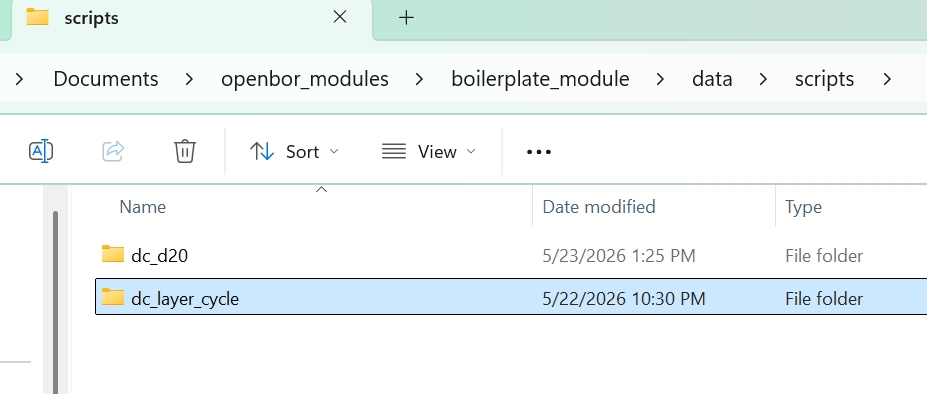
3. Unpack or copy the Layer Cycle folder and place it into data/scripts.
4. Add the following line to any script that will use the layer cycle library:
#include "data/scripts/dc_layer_cycle/main.c"
The library is now ready to use.
Set up
Prepare Images
Before you do anything with the scripts, you will need to prepare your layers. All the typical sprite rules apply.
- Make sure each sprite in a group shares the same palette. Do not shortcut this.
- Don’t try to trim sprites individually – you are only wasting your own production time and making placement more difficult. OpenBOR auto trims and optimizes sprites on startup. Instead, find a uniform size (preferably a multiple of four) for all the sprites in a group.


Prepare Level
Once you have your layer sprites ready, use the fglayer level command to place them into the level text. Only fglayer is accepted by this library. The legacy layer and bglayer commands are not supported.
You will need to tune the layer settings for your specific project. The Z position controls where the fglayer is drawn in relation to the stage’s Z space, and it is affected by the level’s Z boundaries and internal layer math. This means it may take a little experimentation to place the layer exactly where you want it.
Placement is otherwise the same as placing any other fglayer, and you may freely use the layer’s other settings. For a typical animation, each frame should use the same layer configuration and appear in consecutive layer slots. Note that layers are offset to the top-left of an image by default.
# Z xratio zratio xoffset zoffset xspace zspace xrepeat zrepeat trans alpha w-mode amp wl ws move quake neon
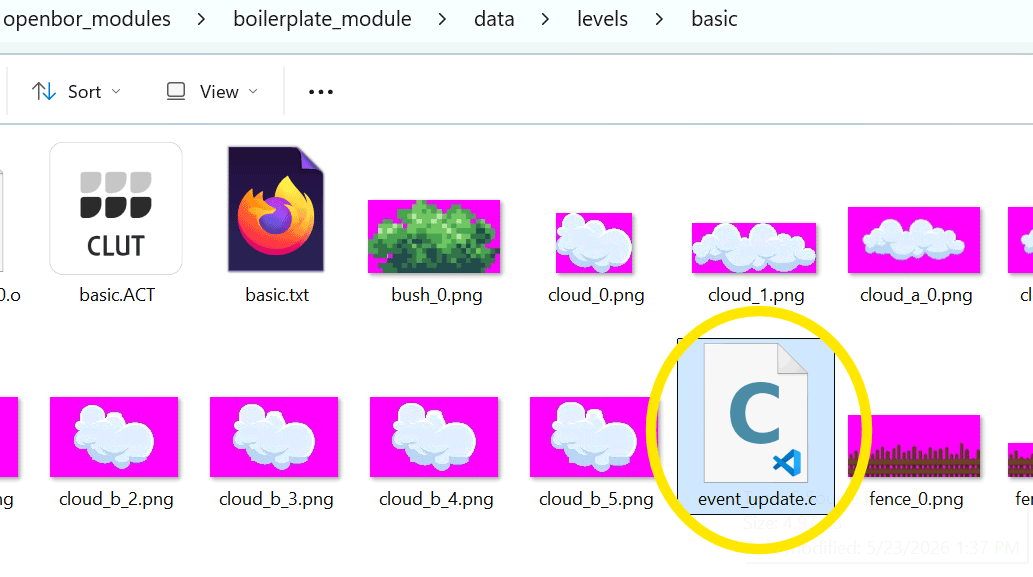
fglayer data/levels/basic/cloud_b_0.png -300 0.7 0.0 50 40 100 0 -1 1 1 0 0 0 0 0 2.0 0 0
fglayer data/levels/basic/cloud_b_1.png -300 0.7 0.0 50 40 100 0 -1 1 1 0 0 0 0 0 2.0 0 0
fglayer data/levels/basic/cloud_b_2.png -300 0.7 0.0 50 40 100 0 -1 1 1 0 0 0 0 0 2.0 0 0
fglayer data/levels/basic/cloud_b_3.png -300 0.7 0.0 50 40 100 0 -1 1 1 0 0 0 0 0 2.0 0 0
fglayer data/levels/basic/cloud_b_4.png -300 0.7 0.0 50 40 100 0 -1 1 1 0 0 0 0 0 2.0 0 0
fglayer data/levels/basic/cloud_b_5.png -300 0.7 0.0 50 40 100 0 -1 1 1 0 0 0 0 0 2.0 0 0
Tip: The Z parameter is relative to the stage z boundary. Use this as a starting point when setting the layer’s Z position.
Prepare Script
The last preparation is setting up the script for use. First, create a level script for the level that will contain background animations. Each level should use its own script file, because the animation definitions are level-specific. Usually, you will want to place this file into the same folder as the level.
The script file needs the library #include shown in the installation step. It also needs library calls added to its native ondestroy() and main() hooks. The script should look something like the example immediately below. If it does, you are ready to begin using the library to define animations. Animation definition happens in the create event hook, which we will detail in the next steps.
#include "data/scripts/dc_layer_cycle/main.c"

void oncreate(){

    /*
    * oncreate() is a native function that runs when the host
    * loads.
    */
}

void ondestroy(){

    /*
    * ondestroy() is a native function that runs when the host
    * script is unloaded. We put the cleanup function here to
    * free the layer cycle data array and prevent memory leaks.
    */

    dc_layer_cycle_cleanup();

}

void main(){

    /*
    * main() is a native function that runs each time the host
    * script event fires. Because this is a level update script,
    * it fires on every engine update during the stage. We call
    * the layer cycle advance function here to update all active
    * animations according to their configured frame data and
    * timing.
    */

    dc_layer_cycle_advance();
}
Define Animation Capacity
Before defining frames, allocate the layer cycle data array with dc_layer_cycle_setup(). This tells the library how many animation sequences the level will use, and the maximum number of frames any one animation sequence may contain.
- Animations – The number of individual animation sequences in the level.
- Frames – The frame capacity for the longest animation sequence.
In the exhibition pack, the sample level contains two cloud animations, and each one uses eleven frames. We allocate accordingly:
dc_layer_cycle_setup(2, 11);
Do not confuse frames with sprites. As with a normal model animation, a frame does not have to use a unique sprite. Frames may reuse the same sprite more than once.
That is what the cloud example does. The cloud puffs outward, then returns to its original shape, so some sprites naturally appear again later in the sequence.
Use
All that’s left now is to define your animations. This is accomplished through a single function API:
dc_layer_cycle_frame_setup(animation_id, frame_index, frame_target, frame_action_a[, frame_action_b]);
animation_id– The unique identifier for an animation. For example, if you have two animations, one is0and the other is1. It is up to you which animation is which.frame_index– The animation frame to define.frame_target– This may vary in advanced use, but it normally refers to the layer this frame will display. OpenBOR assigns each layer a zero-indexed ID in the order it appears in the level file.frame_action_a– This may vary in advanced use, but it is normally the frame delay: the time before moving to the next frame.frame_action_b– Optional. This is used for advanced actions covered below.
With this in mind, build an animation sequence by calling dc_layer_cycle_frame_setup() once for each frame of the animation. These calls belong in the level’s oncreate() event, just after allocation.
One advanced action you will likely need is DC_LAYER_CYCLE_ACTION_GOTO. Place this in frame_action_a, and frame_target becomes the frame to jump to. In the simplest use case, pass 0 to create a loop.
Tip: If you have more than one animation, #define a named constant for each animation ID.
This example defines an eleven-frame sequence. It has ten visible frames, all with a delay of twenty. The eleventh is a command frame that loops the animation back to frame 0. It executes instantaneously and is therefore not visible.
    #define DC_CLOUD_ANIMATION_A 0

    dc_layer_cycle_frame_setup(DC_CLOUD_ANIMATION_A, 0, 0, 20);
    dc_layer_cycle_frame_setup(DC_CLOUD_ANIMATION_A, 1, 1, 20);
    dc_layer_cycle_frame_setup(DC_CLOUD_ANIMATION_A, 2, 2, 20);
    dc_layer_cycle_frame_setup(DC_CLOUD_ANIMATION_A, 3, 3, 20);
    dc_layer_cycle_frame_setup(DC_CLOUD_ANIMATION_A, 4, 4, 20);
    dc_layer_cycle_frame_setup(DC_CLOUD_ANIMATION_A, 5, 5, 20);
    dc_layer_cycle_frame_setup(DC_CLOUD_ANIMATION_A, 6, 4, 20);
    dc_layer_cycle_frame_setup(DC_CLOUD_ANIMATION_A, 7, 3, 20);
    dc_layer_cycle_frame_setup(DC_CLOUD_ANIMATION_A, 8, 2, 20);
    dc_layer_cycle_frame_setup(DC_CLOUD_ANIMATION_A, 9, 1, 20);
    dc_layer_cycle_frame_setup(DC_CLOUD_ANIMATION_A, 10, 0, DC_LAYER_CYCLE_ACTION_GOTO);
That’s all you need for a basic sequence. When you start up the level, your animation should be playing.
Tip: Layer sprites and scripts are destroyed on level exit and reloaded on level start. That means you can hot edit layers and definitions without restarting the engine. Just exit and reload the level – your changes will be live.
This example is straight from the pack in module. It demonstrates the complete function with two discrete animation sequences defined. The first takes advantage of randomized delay.
#include "data/scripts/dc_layer_cycle/main.c"

void oncreate(){

    /*
    * oncreate() is a native function that runs when the host
    * loads. We put the setup function here to initialize the
    * layer cycle system and define our animation blocks and frames.
    */

    /*
    * Set up the layer cycle system with a
    * maximum of 2 animations and 11 frames
    * per animation. This will accommodate
    * the cloud animation blocks in the sample
    * stage.
    */
    dc_layer_cycle_setup(2, 11);

    /*
    * Define animation IDs for the cloud animations.
    */
    #define DC_CLOUD_ANIMATION_A 0
    #define DC_CLOUD_ANIMATION_B 1

    /*
    * Each call sets up one frame within an animation block.
    * Animation ID, frame index, target, and action are specified
    * for each frame.
    */

    dc_layer_cycle_frame_setup(DC_CLOUD_ANIMATION_A, 0, 0, 20, 40);
    dc_layer_cycle_frame_setup(DC_CLOUD_ANIMATION_A, 1, 1, 20, 40);
    dc_layer_cycle_frame_setup(DC_CLOUD_ANIMATION_A, 2, 2, 20, 40);
    dc_layer_cycle_frame_setup(DC_CLOUD_ANIMATION_A, 3, 3, 20, 40);
    dc_layer_cycle_frame_setup(DC_CLOUD_ANIMATION_A, 4, 4, 20, 40);
    dc_layer_cycle_frame_setup(DC_CLOUD_ANIMATION_A, 5, 5, 20, 40);
    dc_layer_cycle_frame_setup(DC_CLOUD_ANIMATION_A, 6, 4, 20, 40);
    dc_layer_cycle_frame_setup(DC_CLOUD_ANIMATION_A, 7, 3, 20, 40);
    dc_layer_cycle_frame_setup(DC_CLOUD_ANIMATION_A, 8, 2, 20, 40);
    dc_layer_cycle_frame_setup(DC_CLOUD_ANIMATION_A, 9, 1, 20, 40);
    dc_layer_cycle_frame_setup(DC_CLOUD_ANIMATION_A, 10, 0, DC_LAYER_CYCLE_ACTION_GOTO);

    dc_layer_cycle_frame_setup(DC_CLOUD_ANIMATION_B, 0, 6, 25);
    dc_layer_cycle_frame_setup(DC_CLOUD_ANIMATION_B, 1, 7, 25);
    dc_layer_cycle_frame_setup(DC_CLOUD_ANIMATION_B, 2, 8, 25);
    dc_layer_cycle_frame_setup(DC_CLOUD_ANIMATION_B, 3, 9, 25);
    dc_layer_cycle_frame_setup(DC_CLOUD_ANIMATION_B, 4, 10, 25);
    dc_layer_cycle_frame_setup(DC_CLOUD_ANIMATION_B, 5, 11, 25);
    dc_layer_cycle_frame_setup(DC_CLOUD_ANIMATION_B, 6, 10, 25);
    dc_layer_cycle_frame_setup(DC_CLOUD_ANIMATION_B, 7, 9, 25);
    dc_layer_cycle_frame_setup(DC_CLOUD_ANIMATION_B, 8, 8, 25);
    dc_layer_cycle_frame_setup(DC_CLOUD_ANIMATION_B, 9, 7, 25);
    dc_layer_cycle_frame_setup(DC_CLOUD_ANIMATION_B, 10, 0, DC_LAYER_CYCLE_ACTION_GOTO);

    /*
    * We don't need these any more.
    */
    #undef DC_CLOUD_ANIMATION_A
    #undef DC_CLOUD_ANIMATION_B
}

[code lang="c"]
void ondestroy(){

    /*
    * ondestroy() is a native function that runs when the host
    * script is unloaded. We put the cleanup function here to free
    * the layer cycle data array and prevent memory leaks.
    */

    dc_layer_cycle_cleanup();

}

void main(){

    /*
    * main() is a native function that runs each time the host
    * script event fires.
    */

    dc_layer_cycle_advance();
}
Advanced
Want to get more creative? No problem. The library gives you several data-driven options to add some spice to animations.
Frame Jump
You can jump to a target frame, or to a random frame within a target range, with DC_LAYER_CYCLE_ACTION_GOTO.
// Jump to frame 0.
dc_layer_cycle_frame_setup(DC_CLOUD_ANIMATION_A, 10, 0, DC_LAYER_CYCLE_ACTION_GOTO);
If you supply an integer to frame_action_b, a random frame is selected each time the jump is triggered. frame_target becomes the minimum frame, and frame_action_b becomes the maximum frame.
// Random jump between frames 0 and 5.
dc_layer_cycle_frame_setup(DC_CLOUD_ANIMATION_A, 10, 0, DC_LAYER_CYCLE_ACTION_GOTO, 5);
This range is inclusive, so the example may jump to frames 0, 1, 2, 3, 4, or 5.
Random Delay
To add a random delay, provide values for both frame_action_a and frame_action_b. frame_action_a is the minimum delay, and frame_action_b is the maximum delay.
// Play frame for 20 to 40 centiseconds.
dc_layer_cycle_frame_setup(DC_CLOUD_ANIMATION_A, 10, 5, 20, 40);
Mutating Properties
You may also set or adjust a layer’s native properties during an animation sequence. To do this, provide the appropriate command constant in frame_action_a. The layer to mutate is supplied through frame_target, and the value is supplied through frame_action_b.
Each supported property has two commands:
- SET – Replaces the property with the supplied value.
- ADD – Adds the supplied value to the property’s current value. Negative values are accepted, so ADD may also decrease a value.
// Set layer 5 alpha to 3.
dc_layer_cycle_frame_setup(DC_CLOUD_ANIMATION_A, 10, 5, DC_LAYER_CYCLE_ACTION_PROP_ALPHA_SET, 3);

// Add 1 to layer 5 alpha.
dc_layer_cycle_frame_setup(DC_CLOUD_ANIMATION_A, 11, 5, DC_LAYER_CYCLE_ACTION_PROP_ALPHA_ADD, 1);
Available Property Constants
All native layer properties are available to mutate. The library enforces value types, so you may not pass an integer to Z Ratio, for example, because it requires a decimal value.
Alpha
DC_LAYER_CYCLE_ACTION_PROP_ALPHA_SET– Sets the layer’salphavalue.DC_LAYER_CYCLE_ACTION_PROP_ALPHA_ADD– Adds to the layer’salphavalue.
Amplitude
DC_LAYER_CYCLE_ACTION_PROP_AMPLITUDE_SET– Sets the layer’samplitudevalue.DC_LAYER_CYCLE_ACTION_PROP_AMPLITUDE_ADD– Adds to the layer’samplitudevalue.
Background Speed Ratio
DC_LAYER_CYCLE_ACTION_PROP_BGSPEEDRATIO_SET– Sets the layer’sbgspeedratiovalue.DC_LAYER_CYCLE_ACTION_PROP_BGSPEEDRATIO_ADD– Adds to the layer’sbgspeedratiovalue.
Enabled
DC_LAYER_CYCLE_ACTION_PROP_ENABLED_SET– Sets the layer’senabledflag.DC_LAYER_CYCLE_ACTION_PROP_ENABLED_ADD– Adds to the layer’senabledflag.
Use this carefully. The library normally controls layer visibility for you, so changing enabled directly can interfere with the normal animation sequence.
Neon
DC_LAYER_CYCLE_ACTION_PROP_NEON_SET– Sets the layer’sneonflag.DC_LAYER_CYCLE_ACTION_PROP_NEON_ADD– Adds to the layer’sneonflag.
X Offset
DC_LAYER_CYCLE_ACTION_PROP_OFFSET_X_SET– Sets the layer’sxoffsetvalue.DC_LAYER_CYCLE_ACTION_PROP_OFFSET_X_ADD– Adds to the layer’sxoffsetvalue.
Z Offset
DC_LAYER_CYCLE_ACTION_PROP_OFFSET_Z_SET– Sets the layer’szoffsetvalue.DC_LAYER_CYCLE_ACTION_PROP_OFFSET_Z_ADD– Adds to the layer’szoffsetvalue.
Z Position
DC_LAYER_CYCLE_ACTION_PROP_POS_Z_SET– Sets the layer’szposition.DC_LAYER_CYCLE_ACTION_PROP_POS_Z_ADD– Adds to the layer’szposition.
Quake
DC_LAYER_CYCLE_ACTION_PROP_QUAKE_SET– Sets the layer’squakevalue.DC_LAYER_CYCLE_ACTION_PROP_QUAKE_ADD– Adds to the layer’squakevalue.
X Ratio
DC_LAYER_CYCLE_ACTION_PROP_RATIO_X_SET– Sets the layer’sxratiovalue.DC_LAYER_CYCLE_ACTION_PROP_RATIO_X_ADD– Adds to the layer’sxratiovalue.
Z Ratio
DC_LAYER_CYCLE_ACTION_PROP_RATIO_Z_SET– Sets the layer’szratiovalue.DC_LAYER_CYCLE_ACTION_PROP_RATIO_Z_ADD– Adds to the layer’szratiovalue.
X Repeat
DC_LAYER_CYCLE_ACTION_PROP_REPEAT_X_SET– Sets the layer’sxrepeatvalue.DC_LAYER_CYCLE_ACTION_PROP_REPEAT_X_ADD– Adds to the layer’sxrepeatvalue.
Z Repeat
DC_LAYER_CYCLE_ACTION_PROP_REPEAT_Z_SET– Sets the layer’szrepeatvalue.DC_LAYER_CYCLE_ACTION_PROP_REPEAT_Z_ADD– Adds to the layer’szrepeatvalue.
X Spacing
DC_LAYER_CYCLE_ACTION_PROP_SPACING_X_SET– Sets the layer’sxspacingvalue.DC_LAYER_CYCLE_ACTION_PROP_SPACING_X_ADD– Adds to the layer’sxspacingvalue.
Z Spacing
DC_LAYER_CYCLE_ACTION_PROP_SPACING_Z_SET– Sets the layer’szspacingvalue.DC_LAYER_CYCLE_ACTION_PROP_SPACING_Z_ADD– Adds to the layer’szspacingvalue.
Transparency
DC_LAYER_CYCLE_ACTION_PROP_TRANSPARENCY_SET– Sets the layer’stransparencyflag.DC_LAYER_CYCLE_ACTION_PROP_TRANSPARENCY_ADD– Adds to the layer’stransparencyflag.
Water Mode
DC_LAYER_CYCLE_ACTION_PROP_WATERMODE_SET– Sets the layer’swatermodevalue.DC_LAYER_CYCLE_ACTION_PROP_WATERMODE_ADD– Adds to the layer’swatermodevalue.
Wavelength
DC_LAYER_CYCLE_ACTION_PROP_WAVELENGTH_SET– Sets the layer’swavelengthvalue.DC_LAYER_CYCLE_ACTION_PROP_WAVELENGTH_ADD– Adds to the layer’swavelengthvalue.
Wave Speed
DC_LAYER_CYCLE_ACTION_PROP_WAVESPEED_SET– Sets the layer’swavespeedvalue.DC_LAYER_CYCLE_ACTION_PROP_WAVESPEED_ADD– Adds to the layer’swavespeedvalue.